Thursday, 23 May 2013

Recipe 36: Pecan and Stilton Twist


I didn't get many pictures of this one as this was part of my marathon bread making weekend and lost track of sometimes of what I had and hadn't done!

I'm going to quickly go through this one as it is very similar to the others. It begins with the usual mixing and kneading, it didn't rise as much as usual but then I only left it just over an hour.

So, once it has risen, you put the pecan and Stilton and mix it into the bread, not knead into the bread like it has said for some of the others. And once this is done, time to knock the air out and divide the dough into 2 equal pieces and roll them out into roughly 30cm pieces.

In the book, it made it sound like you had to tab both pieces on one side, lift it up and twirl in round until it was in a twist. So that's what I did! It was so awkward holding it up and trying to twist it but now as I type it, it sounds so stupid that I did it this way and I'm starting to think maybe I wasn't meant to twist it in the air, oh dear...
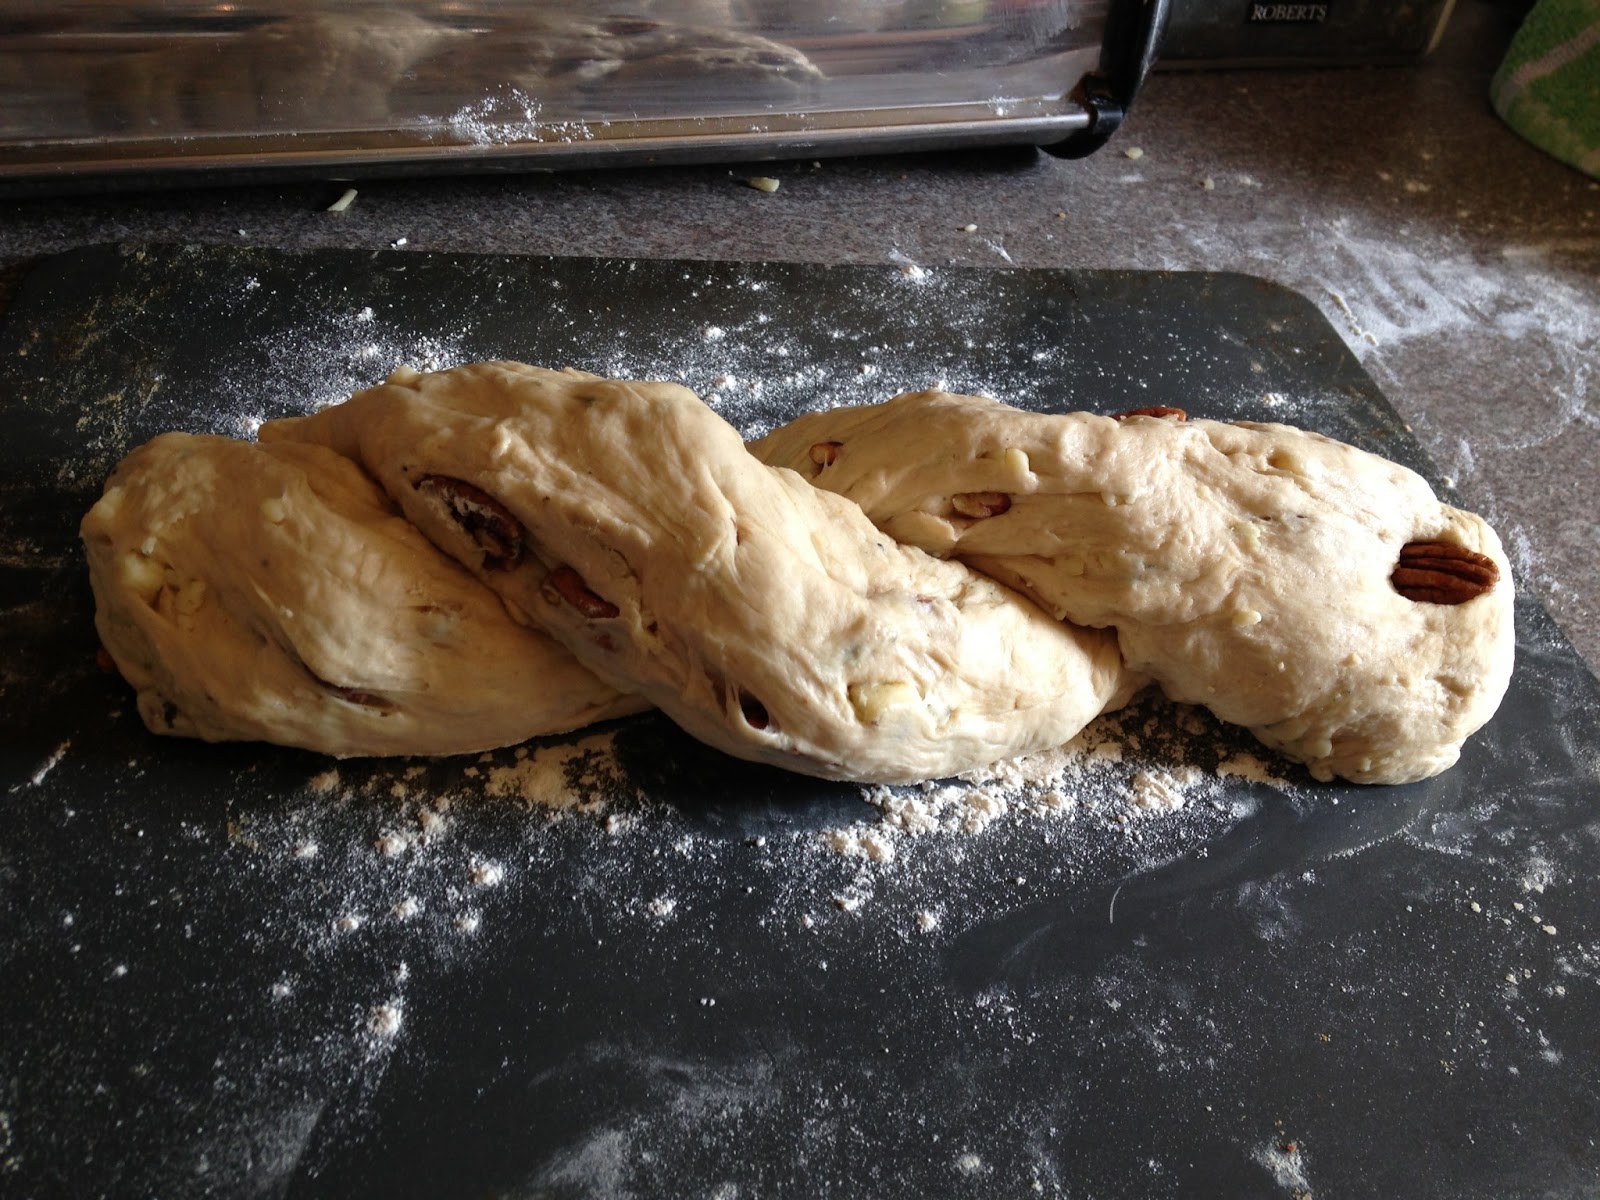

But it doesn't look too bad for being twisted in the air, does it? Again, this is another one of the breads I over proved as you can probably tell from the pictures which is a shame because it would have looked amazing after being baked, etc. In the end though, it looked a little flat and this happens with one of the other breads too, boo!


Reviews? AJ is the only one to have tried this one and I think she liked it the best out of all the 5 breads I did over the weekend so that's something! The only thing I worry about bread with cheese in, it makes it look doughy and not cooked even though it is, if that makes sense?

Monday, 20 May 2013

Recipe 35: Cheddar and Apple Bread


Like the other recipes, it starts with the usual mixing of the ingredients by hand and the kneading for a good old 10 minutes, no less but probably a bit longer if you can! And then of course, leaving the dough to rise.
It was lucky as I managed to leave this for just over 3 hours, I was worried it would start to shrink back down but I got home just in time!


Once it is ready, I poured the dough carefully out onto the floured surface and shaped it out into a rough rectangle which was fun, kinda of like popping bubble wrap!
Then keep patting it out until it's a even bigger rectangle and flatten a bit with your hands too! With the grated cheese and the chopped dessert apples onto one side of the dough and then fold the other piece of dough over the top and then stick the down the edges.
The hardest part was then transferring this beast of dough from the counter to the baking tray. Lucky my tray didn't have raised edges so easier then having to lift it, if not it would of split! But either way, still a nightmare, my dough scraper was the only thing holding it all together!
So finally on the tray, time to leave to prove!


This piece of dough, like I said was a beast! It looks a lot smaller in the book so not sure if mine was over sized but I was still pleased with it! So just before putting it in the oven to bake, sprinkle some flour and then it tells you to make thumb prints all over the dough – it was so bouncy!

Then leave to bake for 30 minutes, I think I over baked mine, the cheese looks like it could have been a bit more runny in the middle but then I'm not sure that's where it's cooled?! This bread baking can be a hard one to tell sometimes!

Reviews? My mum took some into work with her and they seemed to like it! AJ said she wasn't keen but I guess the favours just don't work for everyone!

Sunday, 19 May 2013

Recipe 34: Cheddar and Bacon Loaves


Okay, so this weekend I have managed to bake 5 different breads which is good as I was running behind as I didn't do any last weekend and I can't do any Bank Holiday weekend either – kinda good to catch up and do as many as I could!

Cheddar and Bacon Loaves, another one I was very excited to bake! They are both favours that a lot of people like and go well together so I had a lot of people wanting to try this one too!

It started with the usual mixing of the ingredients with my hands, still love this bit! Then going onto kneading, which isn't too much of a problem now really! I still worry that I've never done it good enough but it's getting much more easier on my arms, maybe I have some muscle there at last!


Then I left it to rise, I think it was around 2 hours so in the meantime I cooked 8 rashes of bacon until they were tender, not cooked properly as it will go in the oven too - then of course chop roughly. I also grated all the cheese ready.

So because I didn't leave the dough as long as usual (recently) it doesn't look as big but as long as its doubled in size, it shouldn't be a problem! Nice and airy still!

Once you pour the dough out onto a lightly floured surface, time to knead the cheese and bacon, this kinda knocks the air out at the same time. So I kneaded for a little while until the ingredients were well distributed. This was fun!


Then cut into four equal pieces and shape into an oval shape. One of them obviously one was not as equal as the others as you can tell from the pictures! Then once shaped, place them on the tray and slash them deeply and a dust of flour and leave them to prove.


 I left them to prove for ages, perhaps for too long I think. I had to go out and get shoes for a wedding (I did get some, yay) and this ended up effecting some of the other breads too unfortunately.

I had to wait a little while longer for the oven to become free and then baked for 20 minutes as soon as available!


The picture above makes the dough look soggy but it really isn't, just where the cheese has melted in! 

Reviews? It went down a treat! They were nice, I'm not a fan of cheese but even I enjoyed them. Alice had one for her dinner pretty much and everyone else that had one seemed to really like them! I think I will be doing these again! 

Monday, 6 May 2013

Recipe 33: Cherry Tomato and Mozzarella Breads


So I didn't get to bake last weekend but for a very good reason – we were in Disneyland Paris to celebrate Alice's 25th Birthday! It was amazing as always! As always the main mouse steals the show! Love this picture :)

Anyway, back the baking!

It starts with the usual ingredients, with a lot of tepid water too! As it is a very wet dough it says to use your mixer with a dough hook and as you may know (or may not!) I only have a hand mixer and the last few times I used it, I've nearly broken it so this time I decided to use my dough scraper and mix it by this for 8 minutes, which was a little tougher – worse than kneading but I suppose it's kinda the same thing in the end!


After this, I had to place it into a square container to rise for an hour. I left it over an hour to give it a little more rise time and it rose well considering I used the dough scraper to mix it!

This is a quick bread to make, so you then tip the dough onto a heavily floured surface very carefully so not all of the air escape! Cut the dough into half and then into half again and you have four pieces!

Stretch the dough and and then this was a fun part (well I thought it was fun) stuffing the tomatoes on the dough and then placing the mozzarella around the tomatoes and then a little sprinkle of oregano and a splash of olive oil on each bread and leave them to rest for 15 minutes.


And not a long wait at all and the bread is ready to do in! It says 15 – 20 minutes, I think I left it in for the 20 minutes because where all the cheese and tomato was it looked a little soggy and I was worried the dough underneath wasn't baked. But I was wrong, they were baked perfectly after all, just the cheese making me worry!


Reviews? Everyone liked them, I do think my dough is improving, of course it's still not perfect but it's getting better! Alice liked the bake, she said 'It tastes just like pizza man!' her exact words.

I'm looking forward to the next bake which involves bacon – I was going to do it this weekend but for the first time every – we had no bacon in our house, typical! That will have to be done next week now!

Oh - 90 recipes to go!

Wednesday, 24 April 2013

Recipe 32: Seeded Bread


I know I say this with most breads, but I was generally excited to make this one, I was hoping it would come out as yummy when you buy a sandwich at the shops, love that bread but it was a complete disaster.

Firstly, I had to buy so many types of seeds which included sunflower, poppy, pumpkin, sesame, linseed and millet seeds, some of them not being the easiest to find. This bread baking is getting expensive! It's fine when your baking your normal average loaf but add a bit of favour and the price goes up!

In this recipe, there are 3 different flours used, strong white, wholemeal and the dreaded Rye flour that always manages to completely ruin my bread, I just can't get along with it, I have no idea where I am going wrong, following the recipe religiously and it just comes out like a slab of concrete!

I honestly thought this recipe would be okay as it wasn't completely Rye flour on it's own, it had other flours to help it on a bit but it truly ruins everything. It did rise a little but the dough goes so bad you can't even knock any air out of it!


The process was the same as all other breads, the mixing, kneading, rising, knocking and proving and in between time putting the seed mix into the dough, which I also make an error on, instead of 20g of Poppy Seeds, I put 80g, major fail on my behalf. I was looking at the picture in the book, thinking I can't even see the poppy seeds then realised my mistake, I got confused looking at the others as they were all mainly 80g, oops!


It's such a shame, I think when I've done all the recipes I will come back to this one and maybe try without the Rye flour as I really wanted to make Seeded Bread! I'm sorry I've basically just had a big moan off about how much I hate using this kind of flour but it's true, it never has worked for me and I follow the recipe to the letter so if any one has any tips of working with Rye Flour or where you think I am going wrong, please let me know! Any helpful hints would be greatly welcomed no matter how big or small!

Look how awful it looks!
Anyway, the next recipe looks yummy, look out for it soon! No baking this weekend as I'll be in Disneyland Paris!


Sunday, 21 April 2013

Recipe 31: Coriander, Olive and Onion Bread

I loved this bread, it was a nice one to make and what a lovely combo of favours!

So we begin with the usual mixing of the ingredients, I tried this using the scraper again and I really do like using it but I'm having trouble picking up all the flour, this way though should be easier but towards the end I usually end up using my hands which works out anyway as I need to take it out the bowl for kneading anyway.

Kneading is getting easier, apparently I make it look effortless too (my mum watched me for a little while, haha) but it is still harder than it looks, but the results are getting better so I take it there must be some muscles strengthen in there! Then time to watch the Bahrain Grand Prix, the perfect amount of time to leave the dough to rise.


Well, that was an exciting race! Anyway, just before having a sneak peak at the dough, it was time to sort the ingredients to favour this bread. A handful of fresh chopped coriander, one onion finely chopped and roughly chopped black pitted olives.

Then tip the dough out of the bowl and then knead all the ingredients back into the dough, you don't have to knead for a full on 1o minutes though, just enough for the favours to be evenly spread. It smelt lovely!


After, you then place back into the bowl to rise again, the book said only 30 minutes but I left mine a little longer, not for any particular reason – just busy!


The next part was to shape the dough, firstly tap it into a rough rectangle and then roll up into a sausage, a bit easier said than done as my dough kept getting stuck onto the surface! But it got there in the end. Time to leave for another hour, this time to prove.


Whilst waiting, I actioned the next part of the recipe – to make a little seed mix for the top of the bread, the seeds were: sesame seeds, nigella seeds and black cumin seeds.


After an hour, when the dough is nice and proved, it's nearly time to finally put it in the oven to bake! But firstly, the seed mix! Brush some warm water over the dough and sprinkle the seeds all over the bread and then time to put it the oven for around half an hour.

The oven really annoyed me today as this was such a lovely bake but one side came out golden brown and the other side came out quite pale, silly oven not giving me an even bake! But either way the result was amazing, I'm not even a fan of olives but I loved it, and onion in bread is amazing, I can't wait to try loads of different of my own favours when I finish the book and I get the feeling onion with some other ingredients might be one of my first to try!

Reviews? As I said above, I don't like olives but I loved this and the bread was so light and airy, was very happy with it! I chopped the loaf in half for the 2 olive lovers I know, my aunt and Gina so I'm sure they will give me an honest review!  


Friday, 19 April 2013

Recipe 30: Garlic Bread


A nice one for the 30th recipe because I was so excited to finally get to bake this! I love garlic bread, well I think about everyone does! But this recipe was a lot different to what I expected.

It starts off with the usual mixing around of ingredients, I tried it a little different by not using my hands to mix it round but with a dough scraper instead. I think this work the water into the mixture better because when I started to knead the dough, it certainly felt much more different than usual! I'm not sure how to describe it but it seemed to stretch more – I'm going to try it again this way in the next recipe and hopefully make a better description then I have at the moment!

Whilst waiting for the bread to rise, the garlic needed roasting. This recipe required three bulbs of garlic, three! I couldn't believe it! Anyway, with a dash of olive oil and a sprinkle of caster sugar I roasted the cloves for around 20 minutes until golden brown.
I cannot believe how pretty this dough looked when I uncovered it, what a surprise! I left the dough much longer than I usually do, I think it was nearly coming up to 3 hours, any longer than I would have been worried that it might fall back down.


By now, the garlic is now nice and cool and onto the next part which confused me as the recipe said to knead the garlic into the dough, which was fun but I found it odd saying to knead it again? But in theory I think I was just knocking out the air as I rolled the garlic in it and just the choice of wording in the book confused me.
Once you've 'kneaded' the garlic into the dough, I had to divide the mixture into 2 and stretch them both into oblong shapes and then leave to prove for an hour, I usually leave over an hour if can though, it's been working out better!


Then time to bake for 25 minutes after a sprinkle of oregano and a dash of olive oil! The smell of garlic and bread baking together is a wonderful mix! And wow, did it make me feel hungry! But what did it taste like? I think I would have liked it better if the garlic was more finally chopped as you had to put the whole cloves in, they got a bit squished when kneading it but because the chucks were so big some parts tasted of garlic and then other parts just tasted like normal bread. I would like to try it again with finely chopped garlic next time!